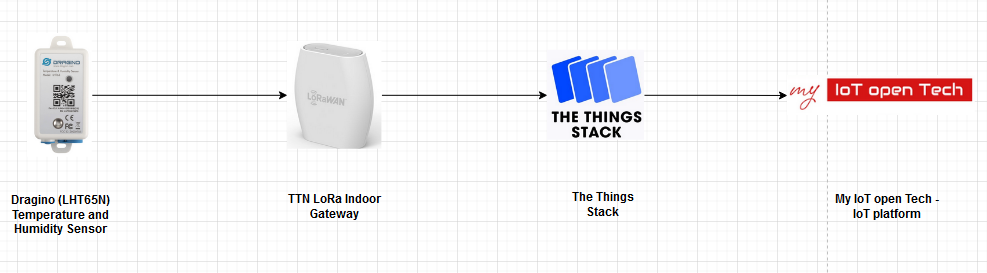
- Sensor/Device (Dragino LHT65N):
The Dragino LHT65N Temperature and humidity sensor is a Long range LoRaWAN Sensor. It includes a built in Temperature and Humidity sensor and has an external sensor connector to connect to an external Temperture Sensor. The LHT65N allows users to send data an reach extremely long ranges. It provides ultra-long range spread spectrum communication. - The Things Network LoRa Indoor Gateway:
The Things Indoor Gateway is designed to be a fully compliant, ultra low-cost LoRaWAN gatway, with WiFi as the backhaul. - The Things Stack:
The Things Stack is a LoRaWAN Network server that enables connectivity, management and monitoring of devices, gateways and end-user applications. - My IoT open Tech (IoT platform):
My IoT open Tech is an IoT platform, developed on top of the ThingsBoard Community edition (Open Source), with a user-friendly design. It aims to decrease the entry bariers to IoT technologies, Prtect data privacy abd raise awareness of its importance and Encourage the coorperative deployment of Community IoT network and tools.
Setup Procedure
Register An account
- Register an account for The Things Stack on the cloud or install on your own hardware (Detailed info https://www.thethingsindustries.com/docs/getting-started/installation/)
Adding devices using the Console
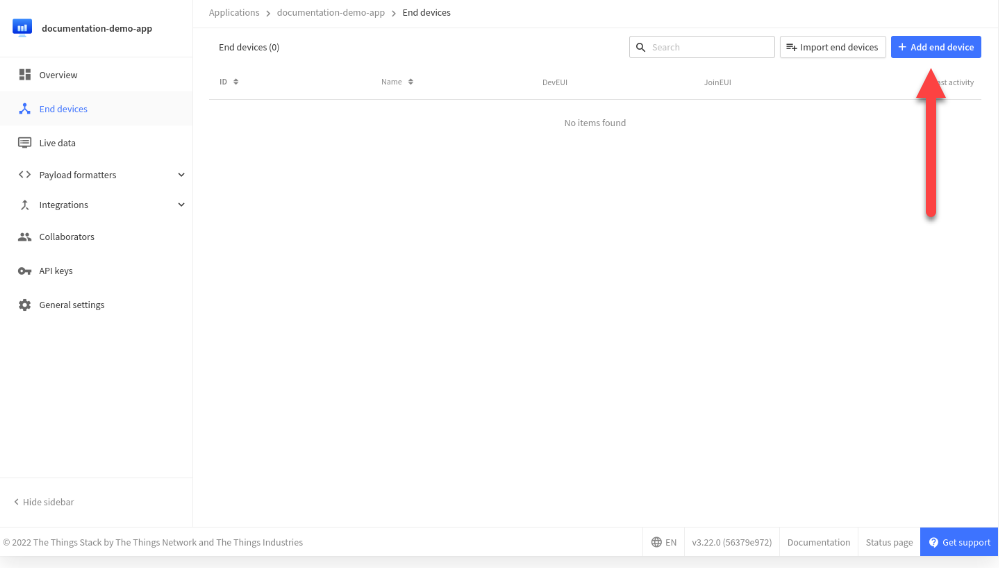
- To create a device, first open the “Application” tab, then open the “End Devices” Tab then click on “+ Add end device” to reach the end device regisration page.
2. You will be presented with options to easily onboard your device using its QR code or register your end device from the LoRaWAN Device Repo or manually.
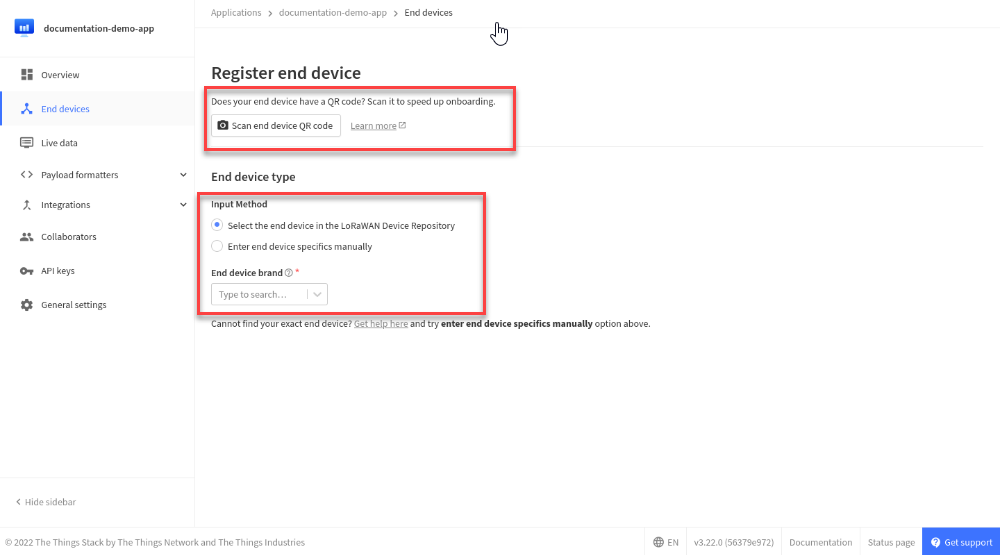
3. In this case The Dragino LHT65N Temperature and humidity sensor is fortunately in the TTN’s repo, so select Select the end device in the LoRaWAN Device Repository input method.
4. Select the “End Device brand” as Dragino Technology Co., Limited
5. Select the “Model” as LHT65
6. Select the “Hardware Version” as Unknown version
7. Select the “Firmware Version” as 1.9.1
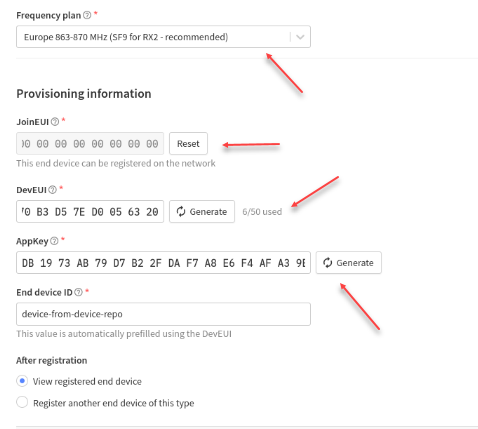
8. Choose a Frequency plan appropriate for your region (More info about Frequency plan here (https://www.thethingsindustries.com/docs/reference/frequency-plans/)
9. Enter the JoinEUI/AppEUI from the sensor’s box
10. Enter the AppKey from the sensor’s box aswell.
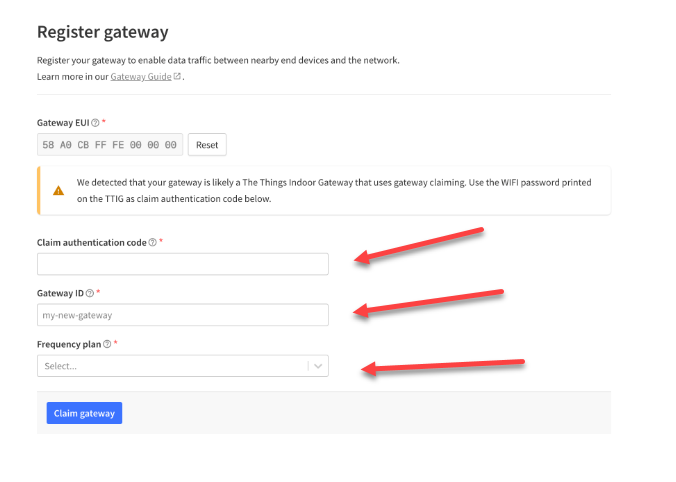
Adding Gateway using the console
- Go to the Gateways in the top menu, and click + Register Gateway
- Fill the Gateway EUI and Click Confirm ( Can be found underneath of the Indoor Gateway)
- Fill in the Authentication Code, Gateway ID and the Frequency Plan
- Click Claim Gateway to finish
5. Hit the setup button (top of the gateway) for 10 seconds till it blinks red
6. The gateway now exposes a AP whose SSID is MiniHUB-xxxxxx where xxxxxx are the last digits of the EUI.
7. The password of the AP is written on the bottom of the Gateway
8. After connecting, go to 192.168.4.1 using a browser
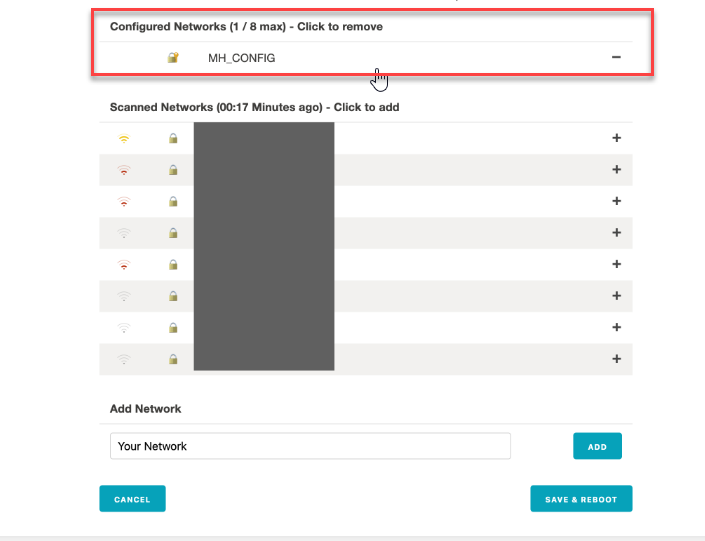
9. Select the wifi you want to connect to and enter the password (if needed)
10. Click Save and Reboot
11. Now you have succesfully connected the Things Indoor Gateway to the Things Stack!!!
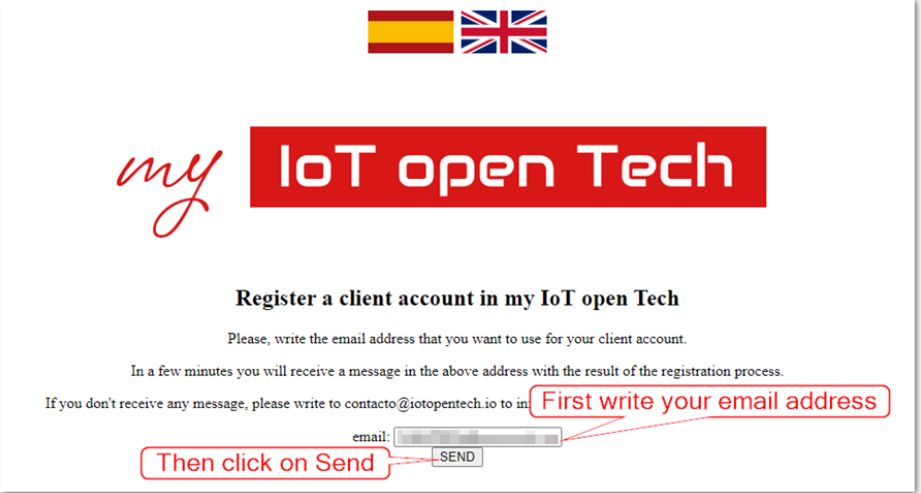
Connection to the IoT platform
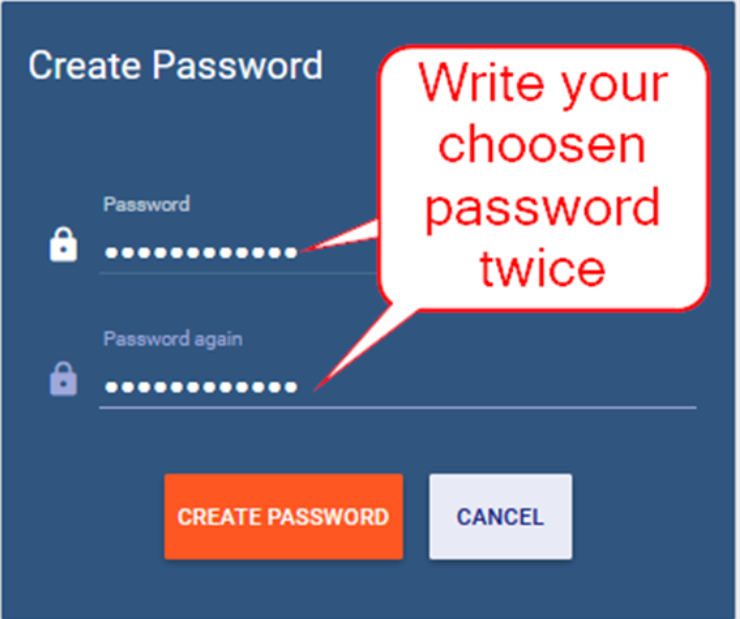
- Go to https://iotopentech.io/register.php,
- Write your email address and press the Send button
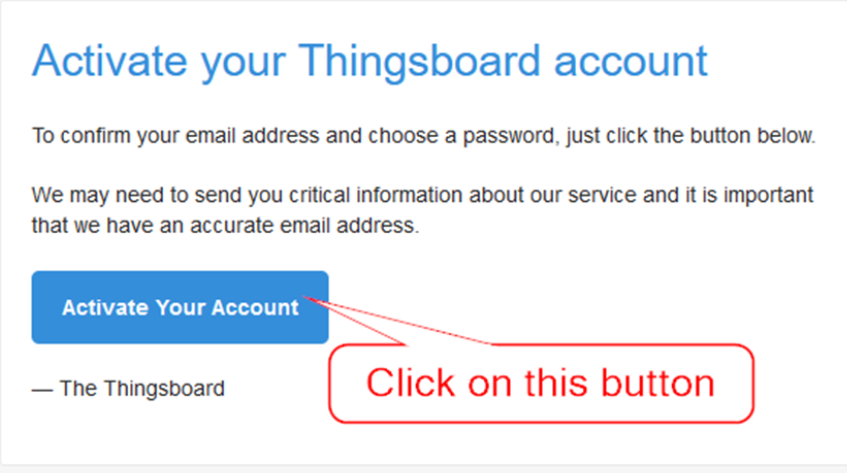
- An email will come to activate your open Tech account
4. Click on “Activate your account” to activate your account
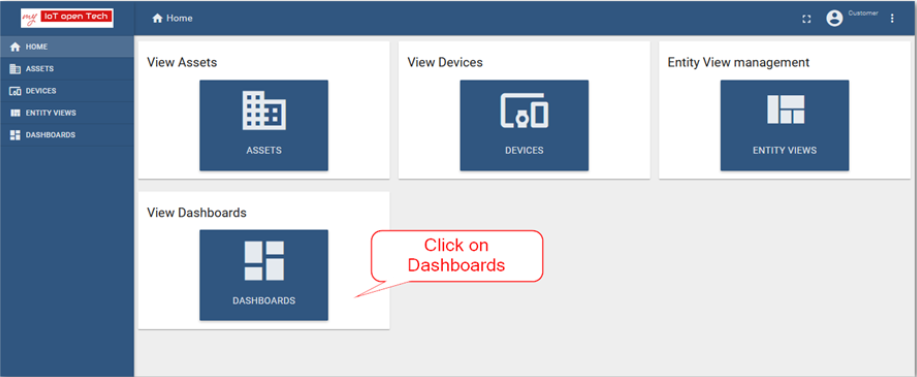
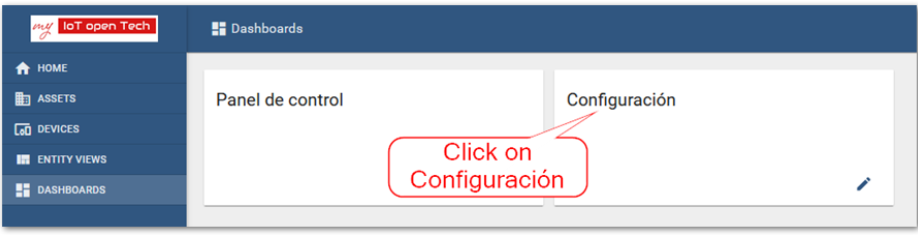
6. Click on “Dashboards” and then on “Configuración”
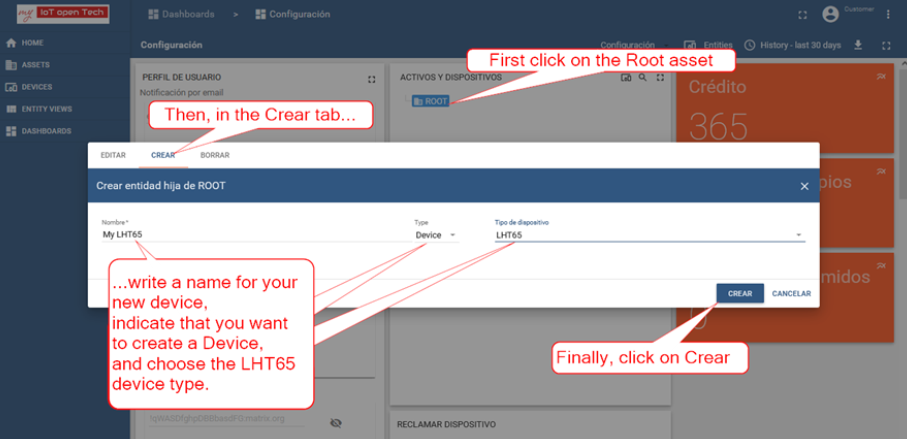
7. Click “ACTIVOS Y DISPOSITIVOS”, click then on the ROOT asses to open its config box.
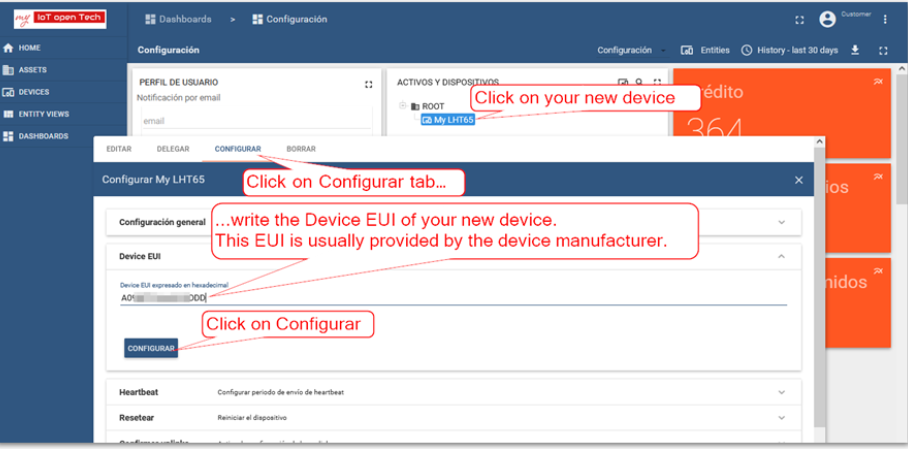
8. In the CREAR tab wite a name for your new Device, select “Device” for the element, choose LHT65 device type and click the CREAR button.
9. Click on your new Device that was just created to open its configuration box. In the tab “CONFIGURAR”, click on the drop down “Device EUI”, write the Device EUI of the device (copy paste from Things Stack)
10. Now create an application in The Things Stack Community Edition Console. More information: (https://www.thethingsindustries.com/docs/integrations/adding-applications/, https://www.youtube.com/watch?v=PpbkBgz1CbI)
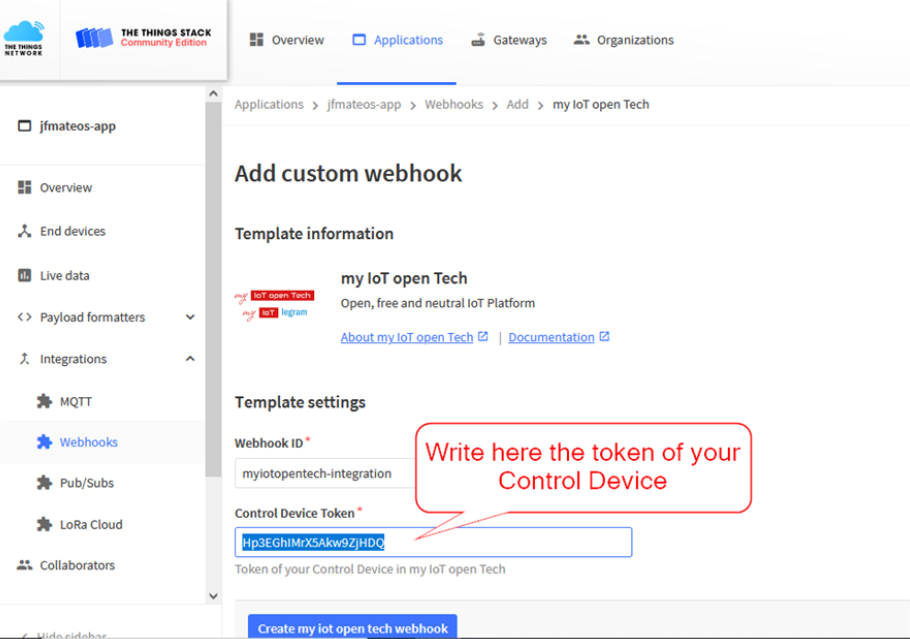
11. Select “Integrations” in the left pannel of your The Things Stack Community Edition application console. Then go to “Webhooks” and then press “Add webhook” button
12. Find “iot open tech webhook” and click on it
13. Enter your Control Device Token
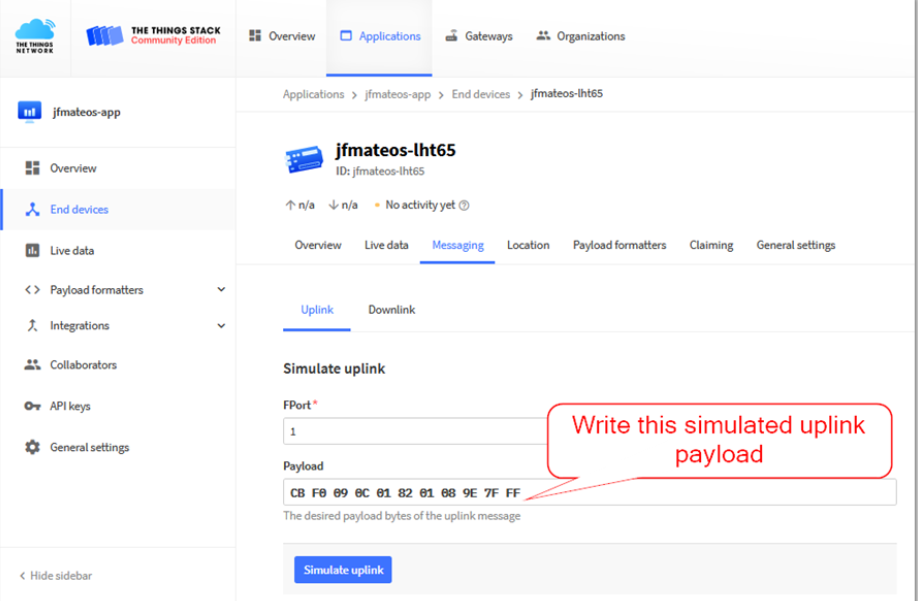
14. In The Things Stack Community Edition console, open the “Messaging” tab of your new device, write CBF0090C018201089E7FFF in the “Payload field” of the Simulate uplink section, and press the button “Simulate uplink”.
15. Now go to your dashboard in my IoT open Tech and click on your device under root assest. The Dashboard should now show.
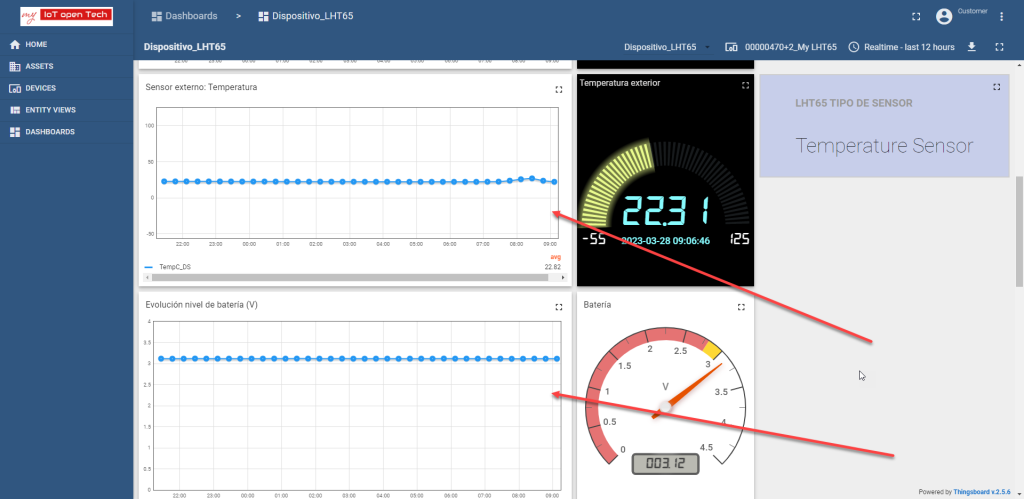
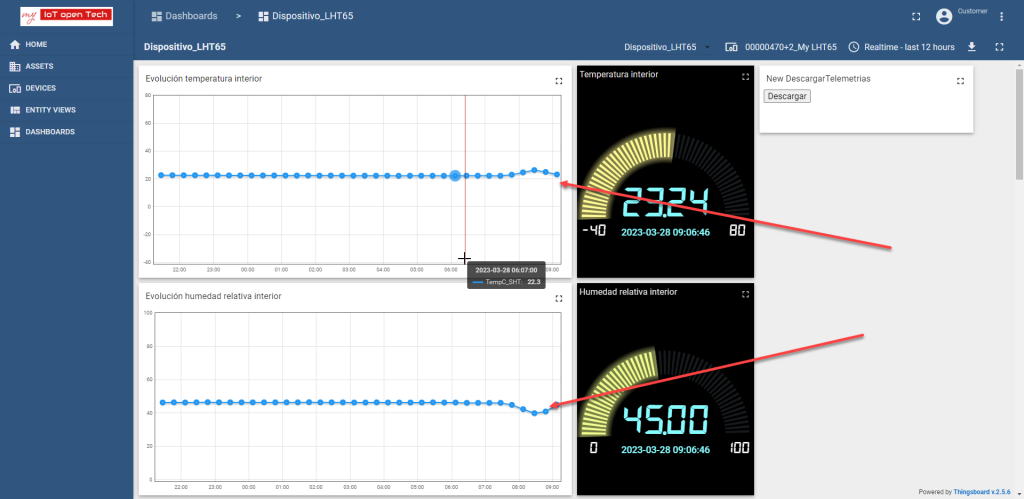
16. Now you have successfully integrated a whole IoT scenario from the sensor to the User Interface